
nikon f4 user manual
Welcome to the Nikon F4 user manual, your guide to mastering this iconic camera․ Discover its innovative features, including matrix metering, autofocus, and electronic shutter control, designed to enhance your photography experience․ This manual will help you unlock the full potential of the F4, ensuring you capture stunning images with precision and ease․ Learn how to set up, operate, and maintain your camera for optimal performance․ With the F4, Nikon redefined professional photography, and this manual is your key to harnessing its power․
Overview of the Nikon F4 Camera
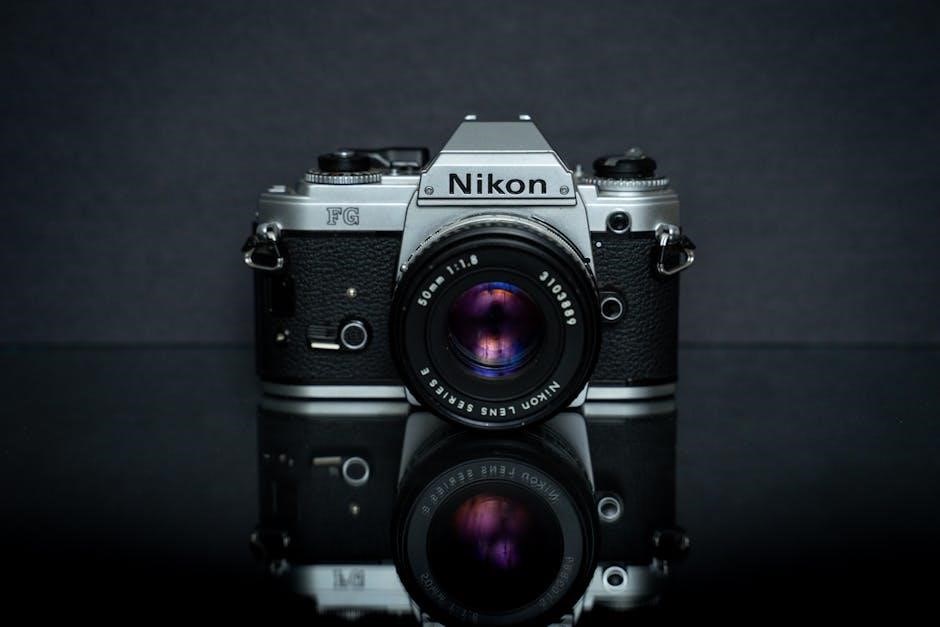
The Nikon F4 is a legendary professional SLR camera released in 1988, marking a significant milestone in Nikon’s history․ Known for its durability and advanced features, it was designed to meet the demands of professional photographers․ The F4 introduced innovations like matrix metering with five zones, ensuring precise exposure control, and the first vertical, electronically controlled shutter․ It also featured an autofocus system with three operating modes, offering versatility for various shooting scenarios․ Compatible with a wide range of lenses, the F4 supported older manual-focus lenses while accommodating newer autofocus designs․ However, it lacked electronic aperture control, limiting functionality with G-type lenses․ The camera’s robust build and intuitive controls made it a favorite among professionals․ Its ability to use AA lithium batteries added convenience, especially in cold weather․ The Nikon F4 remains a testament to Nikon’s commitment to excellence, blending tradition with cutting-edge technology for unparalleled performance․
Key Features of the Nikon F4
The Nikon F4 is renowned for its advanced features, which set it apart as a professional-grade camera․ It introduced matrix metering, offering precise exposure control across five zones, and was the first Nikon SLR with a vertical, electronically controlled shutter․ The F4 also featured an innovative autofocus system with three operating modes—single-servo AF, continuous-servo AF, and manual focus—providing flexibility for various shooting scenarios․ With support for multiple metering modes (matrix, center-weighted, and spot), the F4 catered to diverse lighting conditions․ Its compatibility with a wide range of Nikon lenses, including older manual-focus models, made it versatile for photographers․ The camera also supported AA lithium batteries, ensuring reliability in cold weather․ Custom functions allowed users to tailor settings to their preferences, enhancing workflow efficiency․ The F4’s durability and robust build quality solidified its reputation as a reliable workhorse in professional photography․
Setting Up the Camera
The Nikon F4 requires careful setup to ensure optimal performance․ Begin with unpacking and inspecting the camera for any damage․ Install the recommended batteries, ensuring compatibility and proper installation․ Attach the lens securely, making sure it is properly aligned and clicked into place․ Perform a quick function check to verify all controls are operational․ Familiarize yourself with the camera’s ergonomic design and button layout to streamline your workflow․ Proper setup ensures a smooth and enjoyable shooting experience with your Nikon F4․
Unpacking and Initial Inspection
When you receive your Nikon F4, carefully unpack the box and verify all components are included․ Check for the camera body, lens, batteries, battery grip, charger, neck strap, and user manual․ Inspect the camera body and lens for any visible damage, scratches, or dust․ Ensure the lens is clean and free of smudges․ Examine the viewfinder and LCD for clarity and responsiveness․ Check the battery compartment for proper alignment and ensure no debris is present․ Familiarize yourself with the camera’s exterior, noting the location of buttons, dials, and ports․ Test the shutter release and other controls to ensure they function smoothly․ If any issues are found, contact the seller or Nikon support immediately․ A thorough inspection ensures your camera is ready for use and prevents potential operational problems․ Proper handling during unpacking helps maintain the camera’s longevity and performance․
Installing Batteries
To power your Nikon F4, insert four AA batteries into the battery grip․ Open the battery compartment by sliding the latch located on the base of the grip․ Ensure the batteries are aligned correctly, with the positive terminals facing the correct direction as indicated by the icons inside the compartment․ Avoid mixing old and new batteries or using different types (alkaline, nickel-cadmium, or lithium) to maintain consistent power performance․ Once the batteries are in place, close the compartment securely to prevent any moisture or dust from entering․ The camera will automatically turn on when the shutter release is pressed․ For optimal performance, use high-quality batteries and avoid overcharging rechargeable ones․ Proper battery installation ensures reliable operation and extends the camera’s battery life․ Always handle batteries with care to prevent leakage or damage․
Attaching the Lens
To attach a lens to your Nikon F4, ensure the camera is turned off for safety․ Locate the lens mount on the camera body and align the lens’s mounting index with the camera’s mark․ Gently rotate the lens clockwise while applying light pressure until it clicks securely into place․ Ensure the lens is properly seated and aligned to avoid damage to the mount․ If using a zoom or telephoto lens, handle it by the barrel to maintain balance․ Avoid touching the mirror or internal components to prevent dust and smudges․ Once attached, check the lens for any filters or lens hoods that may need to be added․ Properly attaching the lens ensures sharp focus and optimal image quality․ Always handle lenses with care to prevent scratching or misalignment․

Understanding Camera Controls
The Nikon F4 features intuitive controls, including the mode dial, exposure compensation button, and autofocus controls․ These components work together to simplify camera operation and enhance creativity․
Mode Dial and Shooting Modes
The Nikon F4’s mode dial offers a variety of shooting options, including Program, Aperture Priority, Shutter Priority, and Manual modes․ These settings allow photographers to balance creativity and automation․ Program mode automates most settings for quick shots, while Aperture Priority (A/Av) lets users control depth of field by adjusting the aperture․ Shutter Priority (S/Tv) is ideal for freezing or blurring motion by setting the shutter speed․ Manual mode (M) provides full control over both aperture and shutter speed for precise results․ Additionally, the Memory mode allows users to save custom settings for quick access, enhancing workflow efficiency․ The intuitive design of the mode dial ensures seamless switching between modes, catering to both beginners and advanced photographers․ Understanding these modes is essential for maximizing the camera’s potential in various shooting scenarios․

Exposure Compensation and Bracketing
The Nikon F4 allows precise control over exposure with its exposure compensation feature, enabling adjustments of up to ±5 EV in 1/3-stop increments․ This is accessed via the dedicated exposure compensation button, making it easy to fine-tune brightness in various lighting conditions․ Bracketing is another powerful tool, capturing multiple shots at different exposures to ensure optimal results․ The camera can automatically bracket up to three frames, with adjustable intervals between each shot․ This feature is particularly useful for capturing high-contrast scenes or when merging images using HDR techniques․ Both exposure compensation and bracketing enhance flexibility, helping photographers achieve their desired aesthetic even in challenging lighting environments․ Proper use of these features ensures well-balanced exposures and minimizes the need for post-processing adjustments․
Autofocus and Metering Modes
The Nikon F4 offers a robust autofocus system with a single AF sensor, providing accurate focus acquisition in various lighting conditions․ It supports both AF and manual focus modes, allowing photographers to switch as needed․ The camera also features advanced metering modes, including 3D Color Matrix Metering, which analyzes the scene for balanced exposures․ Center-Weighted Metering prioritizes the central area, ideal for portraits, while Spot Metering measures light from a small section, useful for high-contrast scenarios․ These modes ensure precise exposure control, enabling photographers to capture images with optimal brightness and detail․ By combining these features, the F4 empowers users to handle diverse shooting situations effectively, delivering consistent and professional results․
Operating the Camera
The Nikon F4 operates with precision, offering intuitive controls for seamless photography․ Load film, set the mode, and frame your shot with ease․ The shutter release and advanced autofocus ensure sharp, well-exposed images every time․
Basic Photography Settings
Mastering the Nikon F4 begins with understanding its fundamental settings․ Start by loading film with the correct ISO, set using the dedicated ISO dial․ The mode dial offers essential options: Program, Aperture Priority, Shutter Priority, and Manual․ Aperture Priority (A) mode is ideal for controlling depth of field, while Shutter Priority (S) mode excels for freezing or blurring motion․ Manual mode provides full creative control․ Adjust the aperture using the lens ring and shutter speed via the command dial․ Focus modes include AF (autofocus) and MF (manual focus), with the ability to lock focus using the AF-L button․ White balance options are accessible via the menu, with choices like Auto, Daylight, Tungsten, and Fluorescent․ Metering modes—Center-Weighted, Matrix, and Spot—ensure accurate exposure․ These settings form the foundation for capturing stunning images with the Nikon F4․
Advanced Custom Settings
The Nikon F4 offers a range of advanced custom settings to tailor your shooting experience․ Users can adjust metering modes, including Matrix, Center-Weighted, and Spot metering, to achieve precise exposure control․ Autofocus features like Single Servo AF and Continuous Servo AF provide flexibility for static and moving subjects․ Bracketing options allow for capturing multiple exposures at varying settings, ideal for high-contrast scenes․ Custom functions enable personalization, such as reprogramming the AE-L/AF-L button or setting the camera to remember specific configurations․ These settings enhance the F4’s versatility, catering to both professional and enthusiast photographers․ By exploring these advanced options, users can optimize the camera to their unique shooting style, ensuring exceptional results in diverse photographic situations․
Using the Flash and External Lights
The Nikon F4 features a built-in flash for convenient lighting in low-light conditions․ To activate the flash, press the flash activation button located on the front of the camera․ For more advanced lighting, the F4 supports external flashes like the SB-24 or SB-25, which can be mounted on the hot shoe or connected via a sync cable․ Adjust flash compensation to fine-tune brightness, ensuring balanced exposure․ Red-eye reduction is also available for portraits․ When using external lights, the F4 allows syncing with studio strobes via the PC sync terminal․ This flexibility makes the F4 adaptable to various lighting scenarios, from casual snapshots to professional setups․ Experimenting with these options enables photographers to achieve dynamic and well-lit images in any environment․

Advanced Features
The Nikon F4 offers advanced features like AF Fine-Tune for precise lens calibration, customizable buttons for personalized control, and enhanced metering modes for professional-grade photography․
AF Fine-Tune for Lens Calibration
The Nikon F4’s AF Fine-Tune feature allows users to calibrate the autofocus system for specific lenses, ensuring precise focus accuracy․ This advanced tool is particularly useful for lenses that may have slight variations in focus performance․ To access AF Fine-Tune, navigate to the camera’s custom settings menu and select the appropriate option․ Users can adjust the focus calibration in fine increments, eitherpositive or negative, to achieve optimal sharpness․ Once adjusted, the settings are stored in the camera’s memory, ensuring consistent results with the calibrated lens․ While AF Fine-Tune is a powerful feature, it requires careful testing and adjustment to avoid overcompensation․ It’s recommended to use a focus target and tripod for accurate calibration․ This feature underscores the Nikon F4’s commitment to professional-grade customization and precision photography․
Customizing Camera Buttons
The Nikon F4 allows users to customize camera buttons to suit their personal shooting style, enhancing efficiency and comfort․ Key buttons, such as the AE-L/AF-L button and the Func button, can be reassigned to perform different functions․ For instance, the AE-L/AF-L button can be set to lock exposure, focus, or both, while the Func button can be programmed for quick access to features like metering modes or flash settings․ To customize these buttons, navigate to the custom settings menu, select the button assignment option, and choose the desired function from the available list․ This level of customization ensures that frequently used controls are easily accessible, streamlining your workflow during shoots․ Experimenting with different configurations can help you find the setup that best fits your needs․ This feature is particularly beneficial for photographers who prioritize quick access to specific functions․
Using the Self-Timer and Remote Control
The Nikon F4 features a self-timer and remote control options, enabling photographers to minimize camera shake and capture sharp images․ The self-timer allows a delay of 2, 5, 10, or 20 seconds before the shutter releases, ideal for self-portraits or group photos․ To activate the self-timer, press the self-timer button and use the command dial to set the desired duration․ The remote control, often infrared or wired, provides additional convenience, allowing photographers to trigger the shutter from a distance․ This is particularly useful for long exposures, macro photography, or when the camera is on a tripod․ The remote control can also be programmed for interval shooting or continuous bursts․ Ensure the camera is set to remote mode and the remote is properly synchronized for reliable operation․ These features enhance flexibility and reduce the risk of camera shake, ensuring sharper images in various shooting scenarios․

Image Quality and Settings
The Nikon F4 offers superior image quality with adjustable settings to suit your creative needs, ensuring sharpness, color accuracy, and optimal compression levels for stunning results in every shot․
Understanding File Formats (JPEG, RAW)
The Nikon F4 allows you to capture images in various file formats, with JPEG and RAW being the most commonly used․ JPEG (Joint Photographic Experts Group) is a compressed format that reduces file size, making it ideal for sharing and storage․ It offers a balance between quality and convenience, suitable for everyday photography․ On the other hand, RAW captures uncompressed data directly from the camera’s sensor, providing maximum image detail and flexibility during post-processing․ Shooting in RAW is recommended for professional workflows and when precise control over editing is desired․ The Nikon F4 also offers options to shoot in both RAW and JPEG simultaneously, giving you the best of both worlds․ Understanding these formats helps you choose the right setting for your photography needs, ensuring optimal results in different scenarios․ Always consider your workflow and storage capacity when selecting a file format․
White Balance and Color Modes
White balance on the Nikon F4 ensures accurate color representation by adjusting to the lighting conditions of your scene․ The camera offers several presets, including Auto, Daylight, Tungsten, Fluorescent, and Cloudy, allowing you to match the color temperature of your environment․ For precise control, you can also set a custom white balance using a neutral reference object․ Additionally, the Nikon F4 features various color modes that cater to different photographic styles․ Modes like Standard, Vivid, and Neutral enable you to adjust the level of saturation and contrast to achieve the desired aesthetic․ The camera also supports Picture Control, which allows further customization of sharpening, contrast, and color saturation․ By mastering white balance and color modes, you can enhance the visual appeal of your images and ensure consistent results across varying lighting conditions․ These settings are essential for photographers seeking to refine their creative vision and output․
Noise Reduction and Image Sharpening
Noise reduction and image sharpening are essential tools on the Nikon F4 for enhancing image quality․ Noise reduction minimizes grain in low-light photos by smoothing out digital artifacts, especially in shadow areas․ The camera offers adjustable settings for noise reduction, allowing you to balance detail retention with noise suppression․ Image sharpening, on the other hand, refines edge clarity and texture, making photos appear crisper․ The Nikon F4 provides multiple sharpening levels, from subtle to pronounced, catering to different creative preferences․ These features can be applied globally or adjusted for specific images during post-processing․ Properly utilizing noise reduction and sharpening ensures cleaner, more professional-looking results, particularly in challenging lighting conditions or high-ISO shots․ Experimenting with these settings helps photographers achieve their desired aesthetic while maintaining image integrity; These tools are vital for optimizing the visual quality of your photographs․
Maintenance and Troubleshooting
Regular maintenance and troubleshooting are crucial for ensuring optimal performance and extending the lifespan of your Nikon F4․ This section provides essential tips and solutions․
Cleaning the Camera and Lens
Regular cleaning of your Nikon F4 camera and lens is essential to maintain image quality and prevent damage․ Use a soft, dry cloth to wipe the camera body, paying attention to areas around buttons and dials․ For the lens, use a microfiber cloth and lens cleaning solution to remove smudges and fingerprints․ Avoid using harsh chemicals or abrasive materials, as they may scratch the lens surface․ For stubborn spots, gently breathe onto the lens and wipe with a clean microfiber cloth․ Clean the camera and lens after each use to prevent dust buildup․ Store the camera in a cool, dry place to reduce moisture exposure․ Regular maintenance ensures your Nikon F4 performs optimally and captures sharp, clear images․ Always handle the lens with care to avoid scratches or damage to the glass surfaces․
Updating Firmware
Updating the firmware of your Nikon F4 is crucial for ensuring optimal performance, fixing bugs, and accessing new features․ To update the firmware, visit Nikon’s official website and download the latest version compatible with your camera․ Before starting, ensure your camera has a fully charged battery or use an AC adapter to prevent interruptions․ Follow the on-screen instructions carefully to avoid damaging the camera․ Once the update is complete, restart your camera to apply the changes․ Regularly check for firmware updates to keep your Nikon F4 up-to-date with the latest enhancements and improvements․ Always use official Nikon sources to download firmware to avoid security risks․ Updating firmware is a simple process that ensures your camera operates at its best․
Common Issues and Solutions
While the Nikon F4 is a reliable camera, users may encounter occasional issues․ One common problem is shutter lag, which can be resolved by using the manual (‘M’) mode and ensuring a fast shutter speed․ Another issue is inaccurate autofocus, often caused by dirt on the lens or sensor․ Cleaning the lens and sensor regularly can resolve this․ Some users experience battery drain, which can be minimized by turning off unnecessary features like the LCD screen․ If the camera fails to turn on, check the battery contacts or try using an AC adapter․ For persistent issues, resetting the camera to factory settings may help․ Always refer to the troubleshooting section in the manual for detailed solutions․ Addressing these common problems ensures optimal performance and extends the camera’s lifespan․ Regular maintenance and proper handling are key to avoiding most issues․

Accessories and Compatible Gear
Explore compatible accessories like grips, cases, and remote shutter releases to enhance functionality and protection for your Nikon F4, ensuring optimal performance and durability in various photography settings․
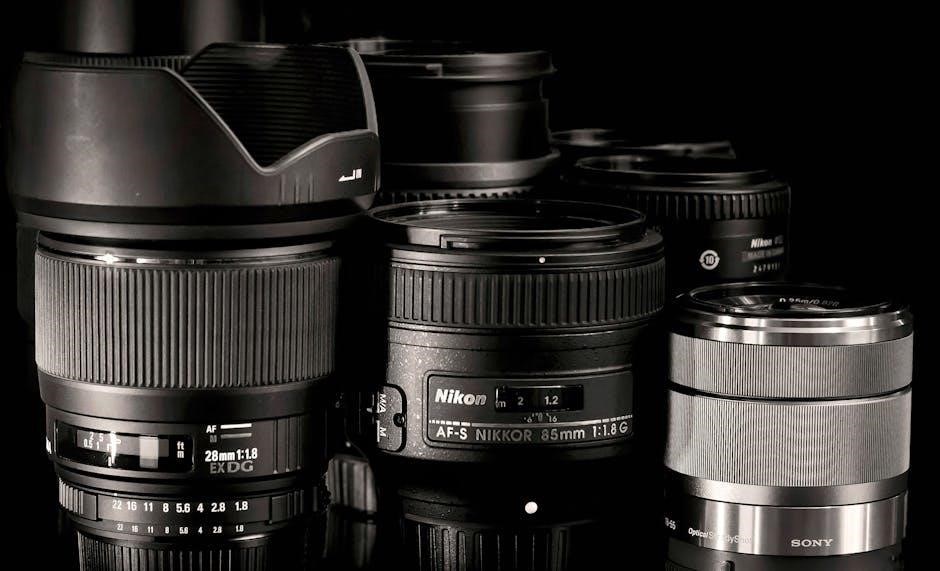
Compatible Lenses for the Nikon F4
The Nikon F4 is compatible with a wide range of lenses featuring the Nikon F-mount, ensuring versatility for various photography needs․ The camera supports both manual-focus AI and AI-S lenses, as well as autofocus AF lenses, including the Nikkor and Series E lenses․ Telephoto, wide-angle, and zoom lenses are all compatible, allowing photographers to capture diverse perspectives․ The F4 also works seamlessly with specialized lenses like fisheye and macro options, enhancing creative possibilities․ When using older manual-focus lenses, users can still benefit from the camera’s metering system, though autofocus functionality may not be available․ This broad compatibility makes the Nikon F4 a flexible choice for photographers seeking to utilize their existing lens collections or explore new optical options for improved image quality and artistic expression․
External Flash and Lighting Equipment
The Nikon F4 is compatible with a variety of external flash units and lighting equipment, enhancing your photography capabilities in low-light conditions․ The camera features a hot shoe mount, allowing direct attachment of dedicated Nikon Speedlights like the SB-24 and SB-26․ These flashes offer advanced features such as TTL (Through-The-Lens) metering for precise exposure control․ Additionally, the F4 supports wireless flash operation when used with compatible units, enabling off-camera lighting setups․ For studio photography, the camera can be synchronized with external strobes via the PC sync terminal․ Other lighting accessories, such as ring lights or continuous LED lights, can also be used to achieve professional-grade results․ By leveraging external lighting equipment, photographers can gain greater control over illumination, reducing shadows and enhancing image quality in challenging environments․ This flexibility makes the Nikon F4 a versatile tool for both amateur and professional photographers․
Other Accessories (Grips, Cases)

In addition to lenses and flash units, the Nikon F4 can be enhanced with a range of other accessories to improve functionality and protection․ The MB-20 Battery Grip is a popular accessory that extends shooting capacity by housing additional batteries, while also providing a more comfortable grip for vertical shooting․ Cases, such as the BL-4 Battery Chamber Case, are designed to store and organize batteries and other small accessories․ For protection, Nikon offers high-quality camera cases like the CF-14 and CF-15, which provide dust and moisture resistance․ Other useful accessories include straps, remote shutter releases, and LCD screen protectors․ These additions not only enhance the camera’s usability but also ensure longevity and protection, making them essential for photographers seeking to maximize their Nikon F4 experience․ By investing in these accessories, users can tailor their setup to meet specific needs and preferences․
The Nikon F4 is a powerful tool offering precision and creativity․ Thank you for reading; we hope this manual has been helpful․ Happy shooting!
Final Tips for Getting the Most Out of Your Nikon F4
To maximize your Nikon F4 experience, experiment with its versatile shooting modes and customize settings to match your style․ Practice with the autofocus system to ensure sharp images in various lighting conditions․ Regularly clean the camera and lens to maintain image quality and prevent dust․ Explore different film stocks to achieve unique tones and textures․ Familiarize yourself with the metering modes for precise exposures․ Use the self-timer or remote control for steady shooting․ Don’t hesitate to try advanced features like bracketing for creative control․ Lastly, keep the manual handy for quick reference․ With practice and exploration, the Nikon F4 will become an extension of your vision, helping you capture stunning photographs with ease and confidence․
Resources for Further Learning
To deepen your understanding of the Nikon F4, explore official Nikon resources, including the comprehensive Nikon F4 user manual available on their website․ Nikon’s official support page offers guides, tutorials, and FAQs․ Additionally, Nikon School provides online courses and workshops to enhance your photography skills․ For hands-on learning, join photography communities, forums, and social media groups dedicated to Nikon users․ Websites like B&H Photo Video and Adorama often feature detailed reviews and tutorials․ YouTube channels like Tony Northrup and Peter McKinnon offer insightful tips and tricks․ Lastly, consider investing in books or eBooks specifically about the Nikon F4 for in-depth insights․ Regular practice and experimentation will help you master the camera’s capabilities and unlock its full potential․